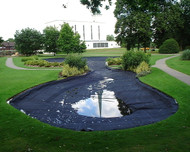
Installing a Pond Liner
Installing a pond can be quite a daunting task however if you are an avid DIYer or serious gardener and fancy a challenge below are a few pointers on how to establish your pond area.
After digging out your pond and checking the surface levels, it is important to make a few considerations before installing your pond liner. One option is to add a layer of sand to aid the liner bedding into the pond structure. By installing a good layer of sand around the pond edges and base it will provide a soft surface and prevent any punctures from stones, roots and rubble that may be lurking. An alternative is to install a polyfelt underlay manufactured from a non-woven geotextile that will also protect the butyl liner from any damage.
A butyl liner is ideal for small garden projects as it can be ordered from Gardener Supplies in any shape and size. To achieve the correct size it is important you calculate the maximum width, length and depth.
It can be difficult to achieve a ‘perfect’ and smooth surface of pond coverage, as a butyl pond liner can be quite heavy, however getting neat creases and folds around the edges of the pond will achieve the desired effect. Secure the pond liner at the top of the pond with rocks so that it doesn’t blow away. Make sure there is plenty of overhang as this will level out as the pond is filled with water. At this stage do not attempt to trim or cut the pond liner as when the pond is filled and settled this overhang will be necessary.
Fill the pond with water, it would be great to leave and fill with rain water however this may take some time dependant on the size of your pond. When the pond if full pull the pond liner into place smoothing any creases out and trim the liner to size.

