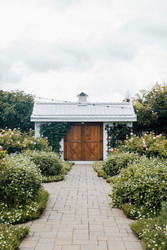
How to build a garden shed
Whether you need extra storage for gardening tools, a workshop, or just a place to relax, building a shed can enhance your garden space. Here's a comprehensive guide to help you construct a sturdy and attractive garden shed.
Step-by-Step Instructions:
Preparing the Site
Choose a level spot in your garden for the shed. Clear the area of any vegetation or debris.
Mark the shed’s footprint with stakes and string, ensuring it’s square by measuring diagonally.
Building the Foundation
For a simple shed, a gravel foundation can be sufficient. Dig out the area, lay landscape fabric, and fill it with gravel.
For more stability, you might choose a concrete slab foundation. Pour the concrete and allow it to cure according to the manufacturer’s instructions.
Constructing the Floor Frame
Build the floor frame using pressure-treated lumber, or with the supplied materials that have come with your shed.
Attach the joists to the perimeter frame using joist hangers, or the fittings supplied. Make sure the frame is level and square. Each corner should be at a 90 degree angle, and if you measure the frame diagonally the measurements should be the same for each opposite corner. If the measurements are different then your frame is not square and may need adjusting.
Cover the frame with exterior-grade plywood, securing it with screws or nails. Be sure to check the instructions with your shed as these can vary in regards to what fixtures and fittings need to be used.
Building the Walls
Construct the wall frames on the ground using lumber. Include openings for doors and windows as per your design. Before fixing anything together make sure you have removed the travel blocks that will have come with the shed to ensure no panels are damaged during transit.
Raise the walls one at a time and secure them to the floor frame. Check that each wall is plumb before fastening them together at the corners.
Sheath the walls with plywood or siding material, attaching it securely.
Constructing the Roof
Build roof trusses or rafters according to your shed design. Attach them to the top plates of the wall frames.
Add roof sheathing, followed by a waterproof underlayment.
Install your chosen roofing material (shingles, metal panels, etc.), ensuring it’s properly sealed to prevent leaks.
Installing Doors and Windows
Install pre-hung doors and windows or build your own. Secure them in place, making sure they open and close properly.
Add trim around the doors and windows to seal any gaps and enhance the appearance.
Finishing Touches
Paint or stain the exterior of your shed to protect it from the elements and match your garden aesthetic.
Add gutters if needed to direct water away from the foundation.
Inside, add shelves, hooks, or other storage solutions to keep your shed organized.
Building a garden shed is a project that requires planning, patience, and a bit of DIY spirit. With these steps, you can create a functional and attractive shed that will serve your garden needs for years to come. Happy building!

